Shokupan (Japanese Milk Bread) Recipe
We are sharing two recipes from James Morton, to celebrate the launch of his new cookbook “The Big Book of Bread” - Recipes and stories from around the globe.

His book explores bread in its myriad forms and offers delicious recipes for recreating loaves from across the globe. James guides you through classic key bakes, many offered and selected by bakers from their countries of origin. Covering savoury favourites including Soda Bread, Sourdough and Shokupan, as well as sweet breads such as Babka, Buns and Brioche, this book showcases a world of delicious loaves.
Extract from "The Big Book of Bread":
"No bread has gone viral like shokupan has gone viral, and I’m not sure how I feel about it. I kind of wish my seeded Scandinavian ryes went viral, or my complex ancient grain sourdoughs, rather than the super-white, super-soft, thick slices of refined wheat and milk. I’m torn between honouring my credentials as a doctor and as a proponent of organic and sustainable agriculture, but how I love white, oh so white, white bread.
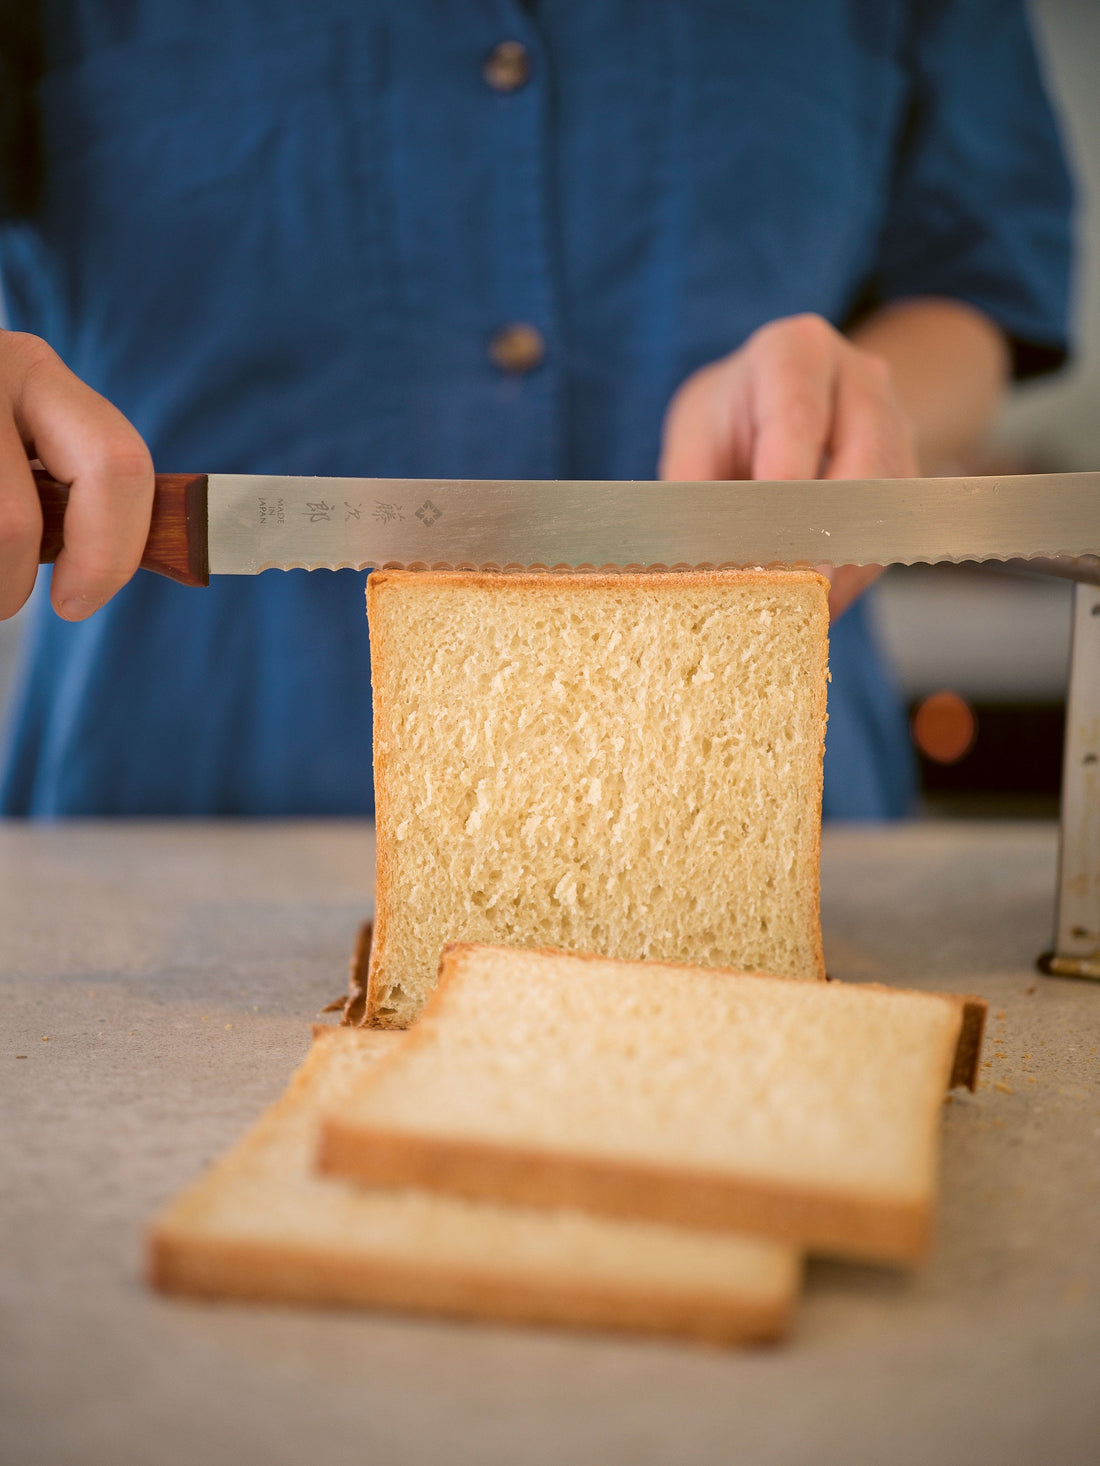
This might trump the pain de mie or milk loaf as the standard white bread favoured by my three-year-old daughter. This high hydration (very wet) dough is popular for its softness and stability, the freshness that lasts for days and days, and its ease of handling. This is all down to using a Yudane or Tangzhong method, both methods of pre-gelatinizing the starches to allow them to hold a lot more water for longer.
The Yudane is the Japanese style, and involves mixing about 20% of your total flour weight with boiling water and letting it sit overnight or all day. This may be fine in sourdough as this kind of corresponds with when you might feed your starter, but otherwise it’s a faff requiring prior planning which – as you’ll know by now – I’m not up for. I prefer the Tangzhong method, where you make a kind of roux, out of 5–7% of your total flour weight and plenty of water, to make a paste. Use much more flour, and I find you get something a bit gluey or rubbery, rather than the soft, fluffy tears of a proper milk bread.
The quantities here make a very large loaf, suitable for commercial-sized lidded Pullman tins. If you don’t have one, reduce the recipe by half, or make two 290g loaf tins full (remember the long shelf life)."

Makes 1 Pullman-style loaf or 2 large loaves
For the Tangzhong
40g strong white flour
120g water
For the dough
800g strong white flour, plus extra for dusting
2 ½ tsp table salt
2 tsp instant yeast
40g unsalted butter, plus extra for greasing
440g whole milk
1 egg
1. Start with the Tangzhong. In a saucepan, weigh your flour and water. Place over a medium heat and, stirring all the time with a whisk or wooden spoon, beat until you get a cooked starchy paste. Set this aside to cool while you make the rest of the dough.
2. For your dough, weigh the flour, salt and yeast into a large bowl. If you are intending to rest the dough in the fridge overnight, reduce the yeast quantity to 1 teaspoon. Use your fingers to mix them together to distribute. Add your butter, then rub this in roughly so that it’s mostly combined. Weigh your milk in a different bowl and warm it in the microwave until it’s neither hot nor cold. Add this to your flour and combine to a dough, along with your egg.
3. Leave it to rest for 10–20 minutes as your Tangzhong cools – this opportunity for an autolyse (rest) really helps this dough come together well and you can hit the lightness you want. Then it’s time to mix the Tanghzong and the dough together – I use an electric mixer with a dough hook (page 35) but feel free to knead it in by hand. You could stop working when the dough is homogenous, but I’d give it a few minutes more until you’ve got something very smooth and glossy.
4. Leave your dough to rest at room temperature for about 90 minutes or so. Alternatively, you can leave it overnight in the fridge. If you’re planning on doing this, I recommend reducing the quantity of yeast to 1 teaspoon.
5. Grease your tin (and lid) with plenty of butter – get it right into the corners. Scrape your dough out onto a lightly floured surface, then use your dough scraper to cut into four roughly equal lumps. To each lump, add a little flour on top then roll until it’s about 5mm (1⁄4in) thick – this is ‘knocking back’ the dough and also developing the gluten excellently. Fold over your edges to make your rectangle the same width as your tin, then roll it up into a tight spiral. Place this in your tin, then repeat with your other lumps until the base of the tin is covered evenly.
6. If your tin has a lid, stick this on. If it doesn’t or you’re using smaller tins, cover the top with a piece of kitchen foil. Prove for another hour at room temperature, or up to overnight in a very cold (2ºC/35ºF) fridge. About 15 minutes before it’s ready, preheat your oven to 200ºC (400ºF) fan (220ºC/425ºF/gas 7).
7. Don’t score this one. Bake with the foil or lid on for 20 minutes, then open the oven and open the lid to check it: if your dough has risen to make contact with the lid, close it again and bake for another 10–15 minutes until a golden brown colour. If it’s not risen that far, that’s OK, but remove the lid to allow the steamy top crust to brown, another 10–15 minutes. Leave to cool in the tin for at least 15 minutes before removing to a cooling rack, if you have to. I tend to let mine cool on the chopping board, knife at the ready. Don’t forget to film yourself tearing this one open, for all the likes.
The Big Book of Bread by James Morton (Quadrille, £30), Photography by Andy Sewell.